Each Sunday school craft I prepare, I make enough for at least 135 children. Yes, you heard me right, 135 children! A lot of the same craft, huh? My church is blessed to have a fantastic resource room with a large selection of die cuts. Boy, are my hands thankful. There are still times I need to get my handy-dandy scissors out and cut 135 of the same shape. Here’s a few tips I’ve learned along the way. Enjoy!
TIP #1: CUT DUPLICATE SHAPES IN ONE FELL SWOOP (WELL ALMOST)
I can’t tell you how many times I’ve seen people cut one shape at a time when they have several of the same shape to cut. I don’t know about you, but the less cutting the better. I find it easier to layer 5 to 10 sheets of paper and then cut out that many shapes at one time. The number of paper layers depends on the thickness of the paper and the quality of the scissors. A sharp pair of scissors always comes in handy when preparing crafts for a crowd.
TIP #2: CUT PAPER TO SIZE
This applies to both your template and your craft paper. Large pieces of paper tend to get in the way as you rotate the paper while cutting. I like to roughly cut out my template and then cut the craft papers just larger than the template. Beware (I’ve learned this the hard way), make sure each piece of craft paper underlaps (nice word I just made up, huh?) perfectly with your template. You don’t want an oopsie when one of your duplicate shapes is unrecognizable. That’s where TIP #3 can come in handy.
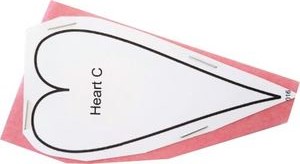
TIP #3: STAPLE LAYERS TOGETHER
Have you ever cut shapes out of layers of paper only to find the bottom piece of paper slipped a little? I’ve done it all too often. Now I staple the layers together along the outside of the shape and voila, the pieces of paper are kept in place. The more intricate the shape, as in the hand below, the more staples.

TIP #4: CUT TOWARD INNER CORNERS
This could also be titled Plan Your Cuts for the Smoothest Result. It’s not always best to start at one point and keep cutting along the shape until you’re done. Assess your shape first. If there are any inner corners, cut inward to each corner. This is a little confusing to describe so here’s a little visual with arrows to illustrate the direction of each cut:


Well, I hope these tips come in handy. If you have tips of your own, I’d love to hear about them in the comment section. Thanks for planting seeds in those little ones!